New Feature Alert! Tag Management Page
Written by Cyndi Arnold
Updated on Mar 04, 2026
Overview
The Tags page in Wastebits allows users to take full control of their tag management. Users can now view, manage, edit, deactivate, merge, and organize tags that have been applied across items, records, and cards within the Wastebits platform.
Tags help you organize, categorize, and filter data efficiently, making it easier to locate and group related items.
This document outlines the layout, functionality, and best practices for using the Tags page.
1. What Are Tags?
Tags are custom labels that users apply to items or data in the Wastebits application to:
- Categorize similar items
- Enhance searchability
- Enable filtered views
- Support reporting and analysis
Tags are displayed with color indicators and descriptive text for quick visual identification.
2. Accessing the Tags Page
- Log into your Wastebits portal.
- Navigate to Tags via the main menu sidebar.
- The Tags page displays all tags currently available in your system.
Note: You must have the appropriate permissions to view or manage tags. Currently, tag management is only available to internal facility users.
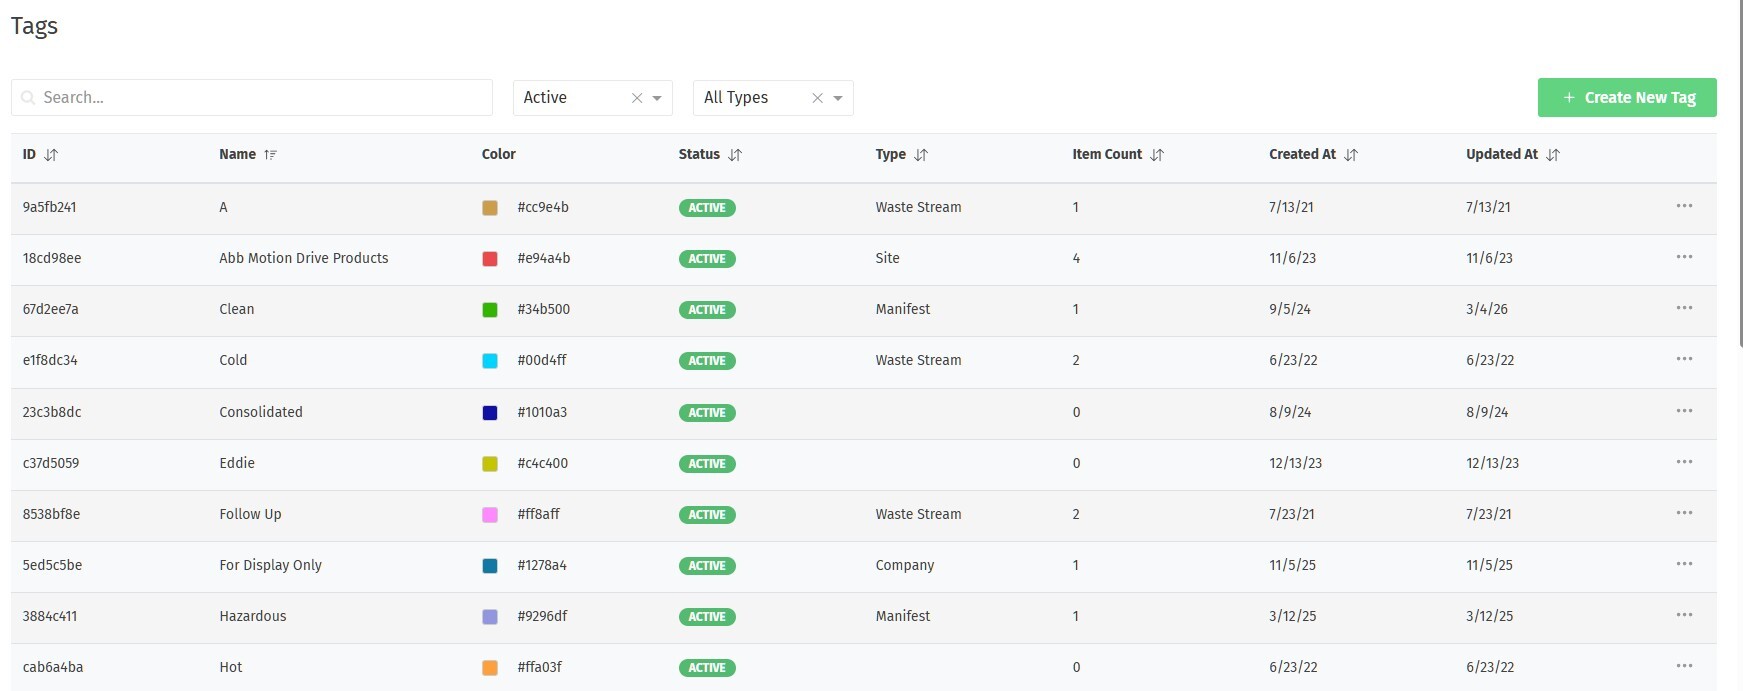
3. Tags List: Page Layout
The Tags list includes the following columns:
- ID - Wastebits unique identifier
- Tag Name - The text label given to the tag (e.g., Hazardous, Approved, Urgent)
- Color - A visual color assigned to the tag, utilizing the hexadecimal color palette to ensure consistent colors across the platform
- Status - Indicates whether the tag is Active or Inactive
- Active = Available for use
- Inactive = Not available for new entities
- Type - Identifies which area of the application the tag applies to (Waste Stream, Manifest, Form, Company, Site)
- Item Count - Number of items/cards currently using the tag
- Created At - When the tag was created
- Updated At - Most recent update to the tag
Filters
- Search - Filter by Tag Name
- Statuses - Active, Inactive, All Statuses
- All Types - Filter by card type (Waste Stream, Manifest, Form, Company, Site)
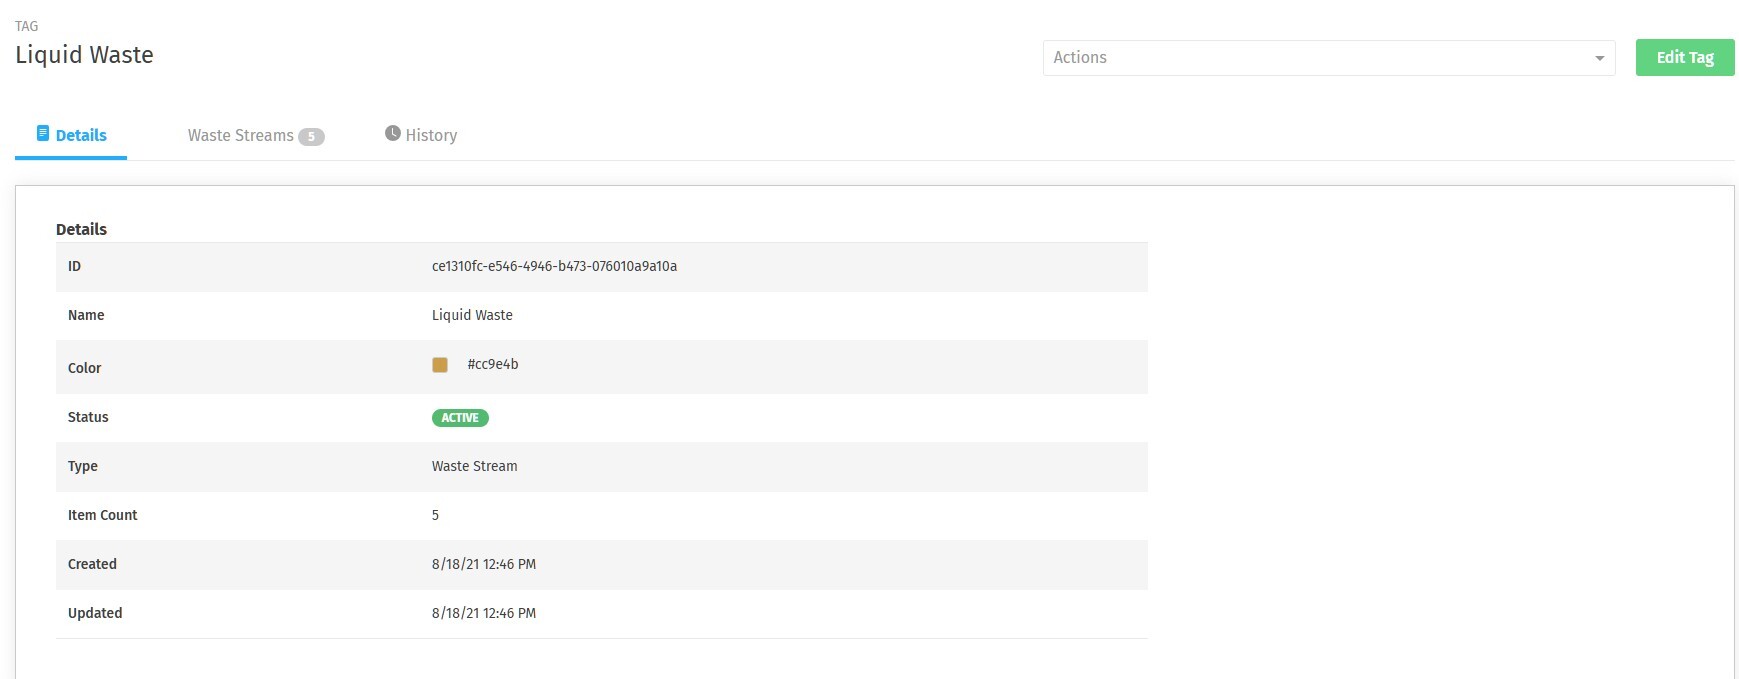
4. Tag Details
Clicking into a tag displays:
- Details — All fields listed in Section 3
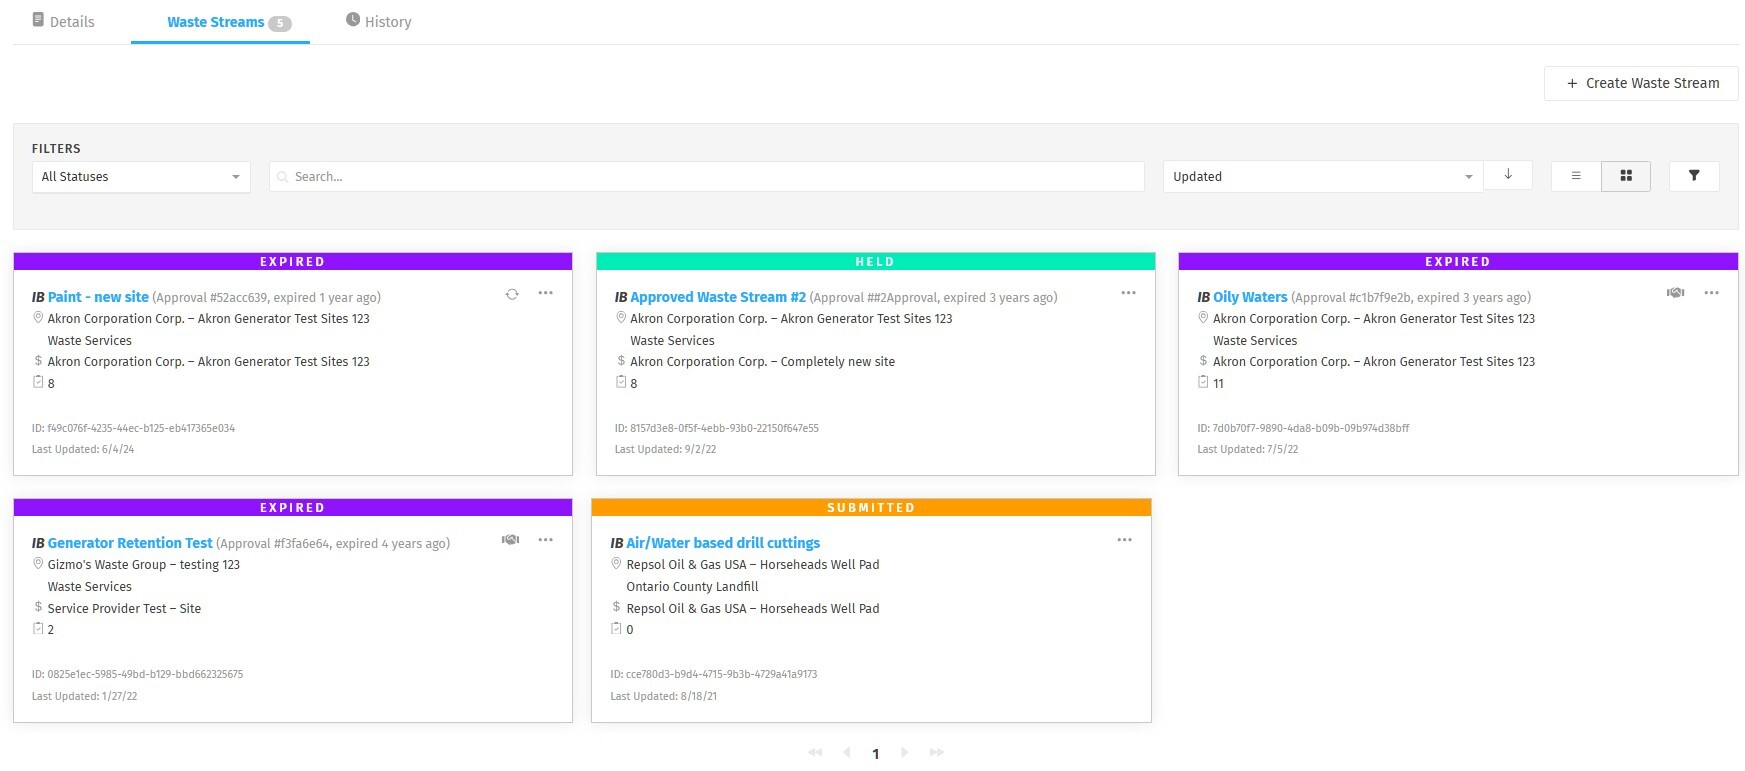
- Entity List — A list of all cards currently associated with the tag
- History — Audit trail showing when the tag was created, modified, deactivated, merged, and by whom
5. Actions You Can Take
Add a New Tag
- Click Create New Tag (or the + icon) from the Tags page or within a specific card.
- Select the Type of tag (Waste Stream, Manifest, Form, Company, Site).
- Enter a descriptive Tag Name.
- Select a Color using the color palette or hexadecimal value.
- Click Save.
Edit an Existing Tag
- From the Tags list, click on the tag you want to edit.
- Select Edit Tag in the top right corner.
- Update the name or color.
- Click Save.
6. Deactivating & Reactivating Tags
Deactivate a Tag
- Click into the tag you would like to deactivate.
- Open the Actions dropdown menu.
- Select Deactivate Tag.
- Enter a reason for deactivation (for audit history purposes).
- Click Deactivate.
Important:
- Deactivated tags will remain visible on entities where they are already applied.
- Deactivated tags cannot be applied to new entities.
Reactivate a Tag
- Filter for Inactive tags.
- Locate the tag.
- Open the Actions dropdown.
- Select Activate Tag.
- Provide a reason for reactivation.
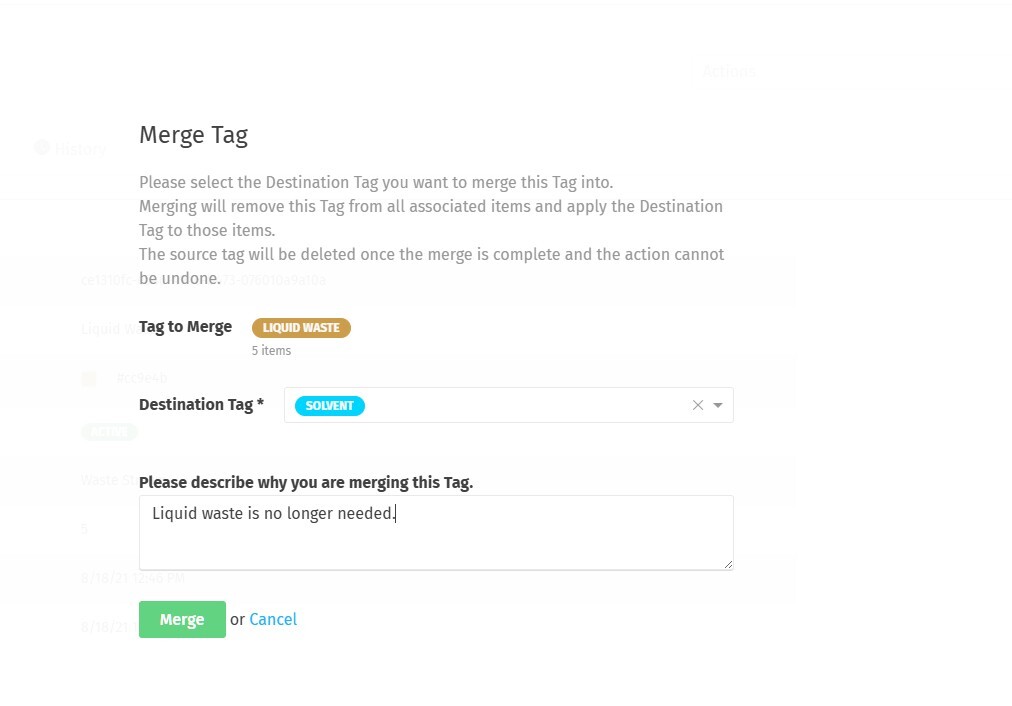
7. Merging Tags
Merging allows you to consolidate duplicate or similar tags.
To Merge a Tag:
- Click into the tag you want to merge from (the source tag).
- Open the Actions dropdown.
- Select Merge Tag.
- Select the Destination Tag (must be the same Type: Company, Site, Waste Stream, Manifest, or Form).
- Provide a reason for the merge (for audit history).
- Confirm the merge.
What Happens During a Merge:
- All entities associated with the source tag will automatically acquire the destination tag.
- The source tag will be permanently deleted.
- The action is recorded in History.
- This action is permanent and cannot be undone.
8. Using Tags in Lists & Filters
- Tags appear on item detail cards and list views once applied.
- Users can filter lists by selecting one or more tags.
- Multiple tag filters may combine using AND/OR logic depending on the interface.
9. Best Practices for Tagging
- Use consistent naming (e.g., Hazardous Waste vs. HazWaste)
- Use meaningful colors to visually distinguish categories
- Avoid duplicate tags — merge when necessary
- Deactivate rather than delete if historical visibility is important
- Document tag naming conventions internally
10. Troubleshooting & Tips
Why don’t I see any tags?
- You may not have permission.
- No tags have been created yet.
- The tag may be inactive.
- The tag may have been merged into another tag.
Tags aren’t filtering my list
- Confirm the tag is applied to the item.
- Check that the tag is Active.
- Verify filter combinations are correct.
11. Who Can Help?
If you need assistance with tag management or functionality within Wastebits, contact:
Wastebits Support
help@wastebits.com
(844) 724-0200