Managing User Account Requests
Written by Ryan Battles
Updated on Apr 06, 2021
Wastebits has released many tools to enable Facilities to manage their customers Companies, Sites, and Users, but what if a new customer stumbles onto your log-in page without an account? This feature will give those Users an opportunity to request an account right from your Portal log-in page.

Users Requesting an Account
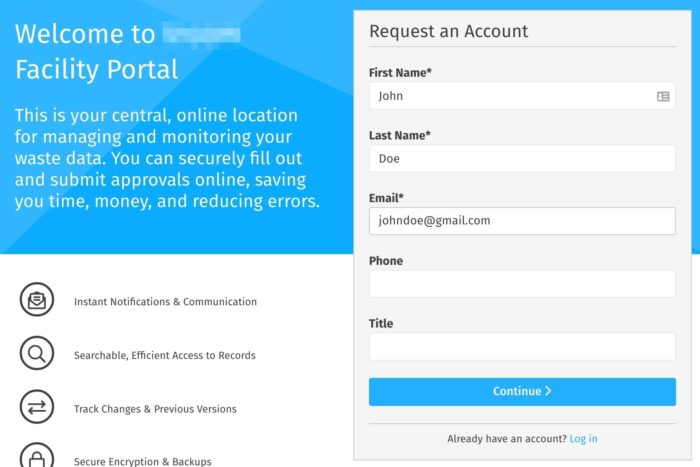
Users requesting an account will be asked for:
- Their name and contact information
- Their company name, address, and type
- The disposal Facility Site(s) they work with the most often. (This selection will be used to determine which Facility Users will be notified of the request). If the user doesn't know what Facility Site(s) they will work with the most often, they will be able to indicate this and select a Facility based on location.
Upon completing the form, the user will receive a confirmation email at the address they submitted.
What if the user requesting an account already has one, and has just forgotten?
If the user requesting an account already has one, they will receive an email with instructions on how to log into their account(s). If they've forgotten their password, they will be able to reset it from the login page.
What if the user sends multiple requests?
If a user submits a duplicate request, Facility users will see record of the duplicate requests and the user will receive an email notifying them that their initial request is still being processed.
Processing User Requests
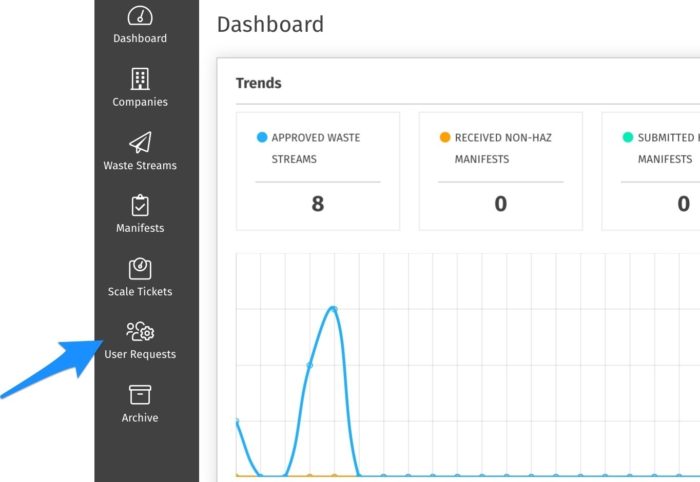
Notifications for account requests will be sent to Facility users (that have notifications enabled in their settings) at the locations that the user selected when they requested their account. However, any Facility user can access the list of requests via the User Requests icon on the left hand panel of your portal.
Requests that still need to be processed will be highlighted in blue. Use the menu (indicated with three dots) to select whether to accept or reject the request.

Accepting a Request
If you choose to accept a request, you will be given the option to add the user to an existing Company, or create a new Company if it does not already exist.
Add to an existing Company
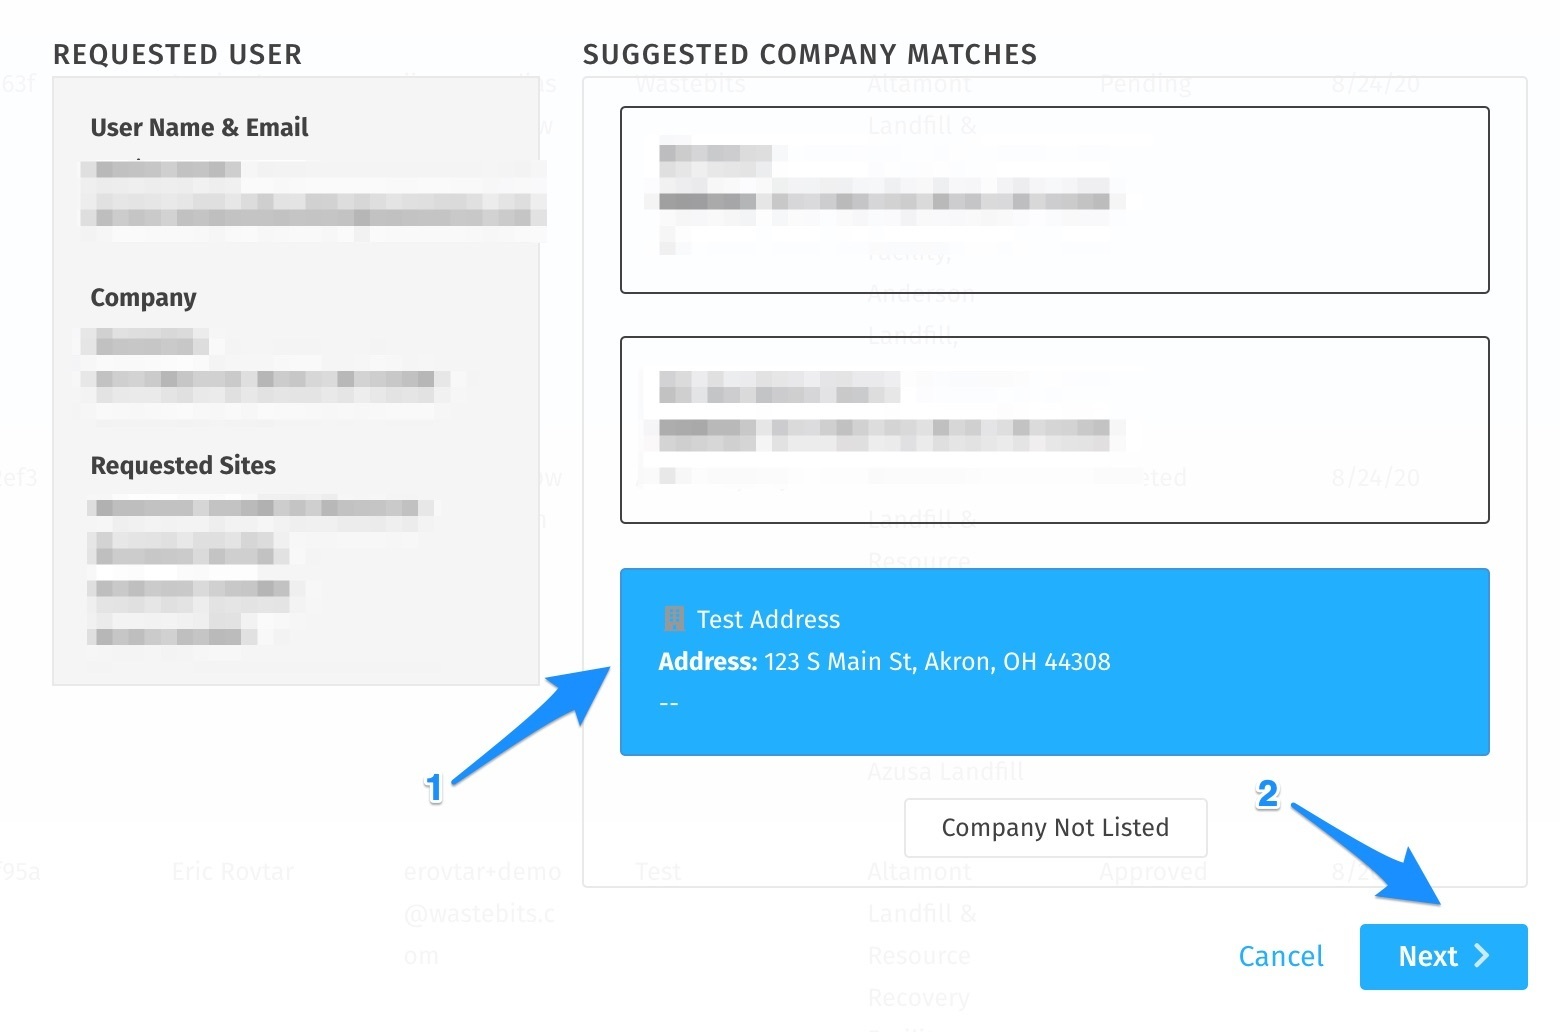
If the user has requested access to a Company that already exists, select it from the suggested company matches, then click Next.
Create a New Company
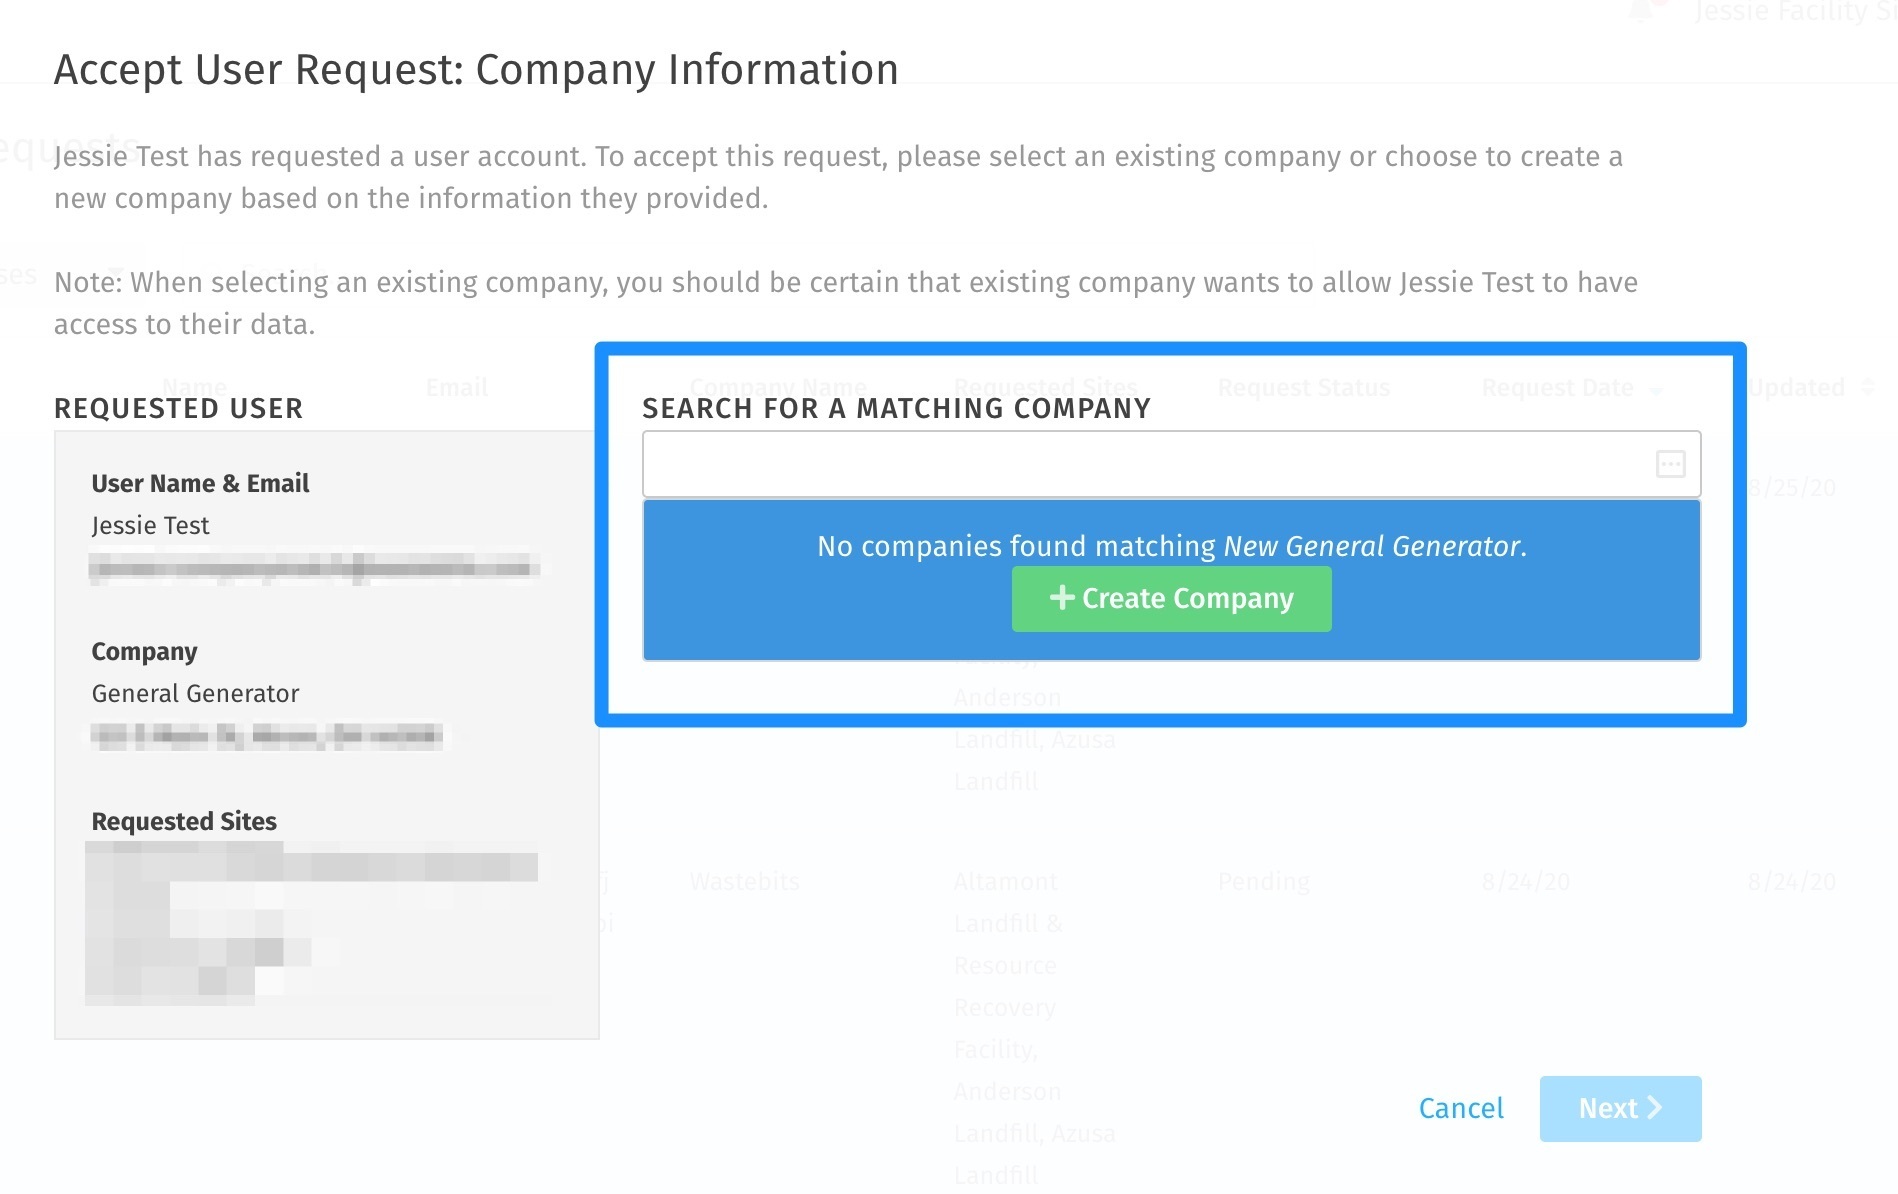
To create a new Company, type in the new Company name in the search bar and click the Create Company button when a match is not found.
Select Permissions
You will then be able to select whether the new User should be a Company Admin or a Site Admin.
- Company Admin: If you select Company Admin, you're all set! Simply click the Accept Request button to finish.
- Site Admin: If you select Site Admin, you'll be given an additional screen to select which Sites the user should have access to. You'll be able to create the Sites if they do not already exist. Once you've selected all sites the new user should have access to, click the Accept Request button to finish.
Rejecting a Request
If you choose to reject a request, you will be required to enter a reason for rejection. That reason will be visible from within the list view and will be sent to the customer in the email that notifies them their request was rejected.

User Request Statuses
- Pending: These requests will be highlighted in blue. They are awaiting review by a Facility user.
- Approved: These requests were processed by Facility personnel. An email was sent to the user requesting the account giving them instructions to claim the account.
- Rejected: These requests were processed by Facility personnel. An email was sent to the user requesting the account informing them that their request was rejected and the reason for rejection.
- Deleted: Requests are automatically deleted when a user with that email address already exists. Users submitting these requests will receive an email with instructions on how to log into their account.